Monday, April 13, 2015

The SS Badger...Dry docked, day 2 CAL

Wow....the massiveness of this Great Lake Michigan monster is overwhelming, from this view...is it not?! Looking at this black and white, dry docked picture captured in all its glory...holds an unsustainable thought process for me...."Have I bitten off more than I can crochet?!" 

Well....when you break it all down, into a daily job...I suppose even the most timid of crafters could handle 100 or so stitches at a time...it's more about consistency here, than anything else.  So, I absolutely believe this sizable project is worth seeing through to the end...even when you have to take a break and move onto other projects that might need your attention today. 
I imagine that's a normal shipbuilders process...somethings have to be built first, while other objects are made to order...to finally bring it altogether at the end of how ever long it takes to put the ship into the water. And so it sits.....dry docked, until its completion.

The SS Badger didn't start out being a ship...it began with an idea, a plan, and a drawing that went through many rough drafts, I'm sure! Just like every crochet pattern...you have to begin with all these thought processes...before you ever get to your hook and yarn. Now, of course...if you're anything like me, you might have ripped your first few rounds out...once or twice by now...lol! Perfection is the key to a great masterpiece when it's all said and done...but, truely...nothing is ever perfect. Some designs have to go back to the drawing board many times, before they even begin to be built. As we progress with our oversized amigurumi today...just remember, you are never alone. You're building right along side of me and many others, who are taking on this large undertaking as well. 

Maybe some actual numbers will help you to realize how very large this ship really is....
It's body is: 410' 6" long, 59' 6" wide, 106' 9" high...which is a staggering 7 stories! It weighs 6,650 tons displaced....Displacement measures weight of a volume of water displaced, not the vessel's absolute weight in pounds put on a scale. 
I am always amazed at myself...that I never stop learning something new everyday....and YOU?!
It holds 600 passengers, 180 cars/vans/trucks, tour buses, RVs, motorcycles, and Semi-trucks. I don't know about all of you, but that is just INCREDIBLE to me! NOW, I know you're asking yourself...how much yarn is this going to take me...well, I'm not that scientific...but we're working a much smaller scale here, but I'd still love to wager...ALOT! 
I think it's safe to say however, we'll use one skein at a time...lol! I'm good with that sort of thing...doesn't sound as scarey to me either...or as expensive!
From what I have learned, it cost an astounding $5 million to create the SS Badger, back in 1952! WOWZA!....Can you imagine the amount of yarn it would cost to YARN BOMB that baby?! 
Now, that's something to think about...for yet, another day!
Well, last week...we started with a partial ball of Heartland Black Canyon, from Lion Brand https//:www.lionbrand.com/ ...and today, Since I ran out of yarn in the middle of our next row, I am attaching the next full skein of  Black Canyon...to keep working out and up!
 To start off with...this is just an example...not the actual join of the current piece I'm working on...this is just to show you how you make it all come together in a 'color join', so you can see it better!


From these pics, you can see that starting off from the middle of a row isn't that difficult...you just have to hold your work together tightly, and pull your new strand through your last two loops of your current unfinished sc, then position your hook into the next sc st, while crocheting over a portion of the new tail, as well as, the old tail from the last skein you're just finishing up with. 
As you can see here, from my beloved H hook...it's one of my most used hooks! You might have one of these too...if not now, you will by the time we take a tour through this project...lol!

At Rnd 4, we finished up with 244 sts, (before our stitch marker from the previous round 3)...and now, since our join...we're ready to move ahead!

We're NOW progressing to Rnd 5:
Start off, with a sc in the next 4 sts, then 2sc, 1sc, 1sc, 2sc, 1sc, 1sc, 2sc, 1 sc, 1sc, 2sc, then sc in the next 110 sts, bringing you back to the other side...then, repeating the last pattern in reverse (2sc, 1sc, 1sc, 2sc, 1sc, 1sc, 2sc, 1sc, 1sc, 2sc) then sc 110 sts back...leaving you with 252 sts, in this round. 

Rnd 6:
*2sc, sc in the next 3 sts* (5x), 2sc, (27 sts complete), sc in the next 105 sts, *2sc, sc in the next 3 sts* (5x), 2sc, sc in the next 105 sts...leaving you with 264sts in this round.

Rnd 7:
*2sc, sc in the next 4 sts* (5x), 2sc, (32 sts complete), sc in the next 106 sts, *2sc, sc in the next 4 sts* (5x), 2sc, sc in the next 106sts...leaving you with 276 sts in the round.


As your bottom progresses, when you turn it over...you'll see all your joins...this is your 'Underbelly'... And before stuffing, you'll want to secure these stragglers by weaving them in to your completed work, with a yarn needle. 

In the meantime, we can continue on with our next Rnd 8:
*sc in the next 6sts, 2sc in the next st* (5x), (leaving you with 40 sts to begin this round), then sc across 103 sts. *2sc, sc in next 6sts* (5x), and sc across the remainder 103 sts, leaving you with 286 sts. at the end of this round.

Rnd 9:
In this round, you'll sc around, in every stitch of this round...286 sts.

Rnd 10 & 11:
We're makin' progress ya'll! In these 2 rounds, you'll be crocheting in the (BLO) or back loop only, 1 sc in each st around...286 sts, in each round you complete.

We are now changing the direction of how our yarn is going to lay...and we're now repositioning it, to begin coming up off of the table now. This is how you create depth to your project...and now, it no longer can be considered a 2-D piece. Since an amigurumi is a toy, it has to change shape...and so, it begins!
For any of you who have ever crocheted slippers...think of this part as a 
VERY LARGE SLIPPER BOTTOM!

Rnd 11 & 12:
When you begin this round, you'll want to begin picking up both your stitches again...you are NO longer just working in the back loops...now, continue to sc in each stitch around one more time, 
286 sts...in each of the next two rounds.
Here, you will begin to see the sides coming up off of the bottom of the table now.

Rnd 13: 
In this round, we want to start our sc sts in each FLO (front loop only)...and continuing around for 286 sts....this begins to fan our base out and away from our bottom, just a bit more! In so doing this...we're creating the BELLY of the ship!
Rnd 14:
 Now, sc in the next 159 sts, 3sc in the next st, (place another st marker in the middle stitch of this increase) and continue to sc around in the next 126 sts. (288 sts)

Rnd 15:
Next, sc in the following 160 sts, 3sc in the next st, (replace the st marker) and continue around in the next 127 sts. (290 sts)

And....as much as I'd like to keep going today...I'm 5 1/2 hours into this pattern today...and need to go on to something else...like lunch! 
We'll see you here again soon...for some more lil' ss crochetin' rounds. We've covered some 3,372 sts today...I'd say that's some relatively good crochetin' there...but, like they say...Rome wasn't built in a day...and neither was the SS Badger!


Thursday, April 9, 2015

The Beginning of the SS BADGER in stitches!

Hey all...I was recently challenged by my constituants at "Sisters Unraveled" to create an over-sized amigurumi that looks like the SS Badger.
What's an amigurumi? Oh yeah...it's a toy...stuffed...like a pillow! Now...visualize a large vessel pillow! You never know what you'll find on the bow of the ship...little people perhaps?! hmmmm...
Got me thinkin'...but that'll come later. Today, we're talkin' about the bottom or the creation of the hull of the ship...
And, for any one you who don't know anything about the SS Badger, it's a huge carferry that crosses Lake Michigan every day, May through October! It transports people and things back and forth to work, live and play between the two lakeshores that it now serves. One city, being Ludwig, MI...and the other city being Manitowoc, WI...which is where you'll find me, in our growing artisan store, locally owned and operated by Wisconsin Artisans! We are know as "Favorite Things", selling and dispaying our unique crafts, as well as teaching DIY classes. We're located downtown, along 8th street, inside The Village Square marketplace...at 908 S. 8th St., next door to Ditto! We have everything from antiques to yarn, and everything else new, custom and handmade thrown into our unique, eclectic mix!
 The SS Badger has taken on many a transformation, since March 21, 1953...when it began it's service here, on our GREAT LAKE MICHIGAN! If you've ever had the pleasure to board it's great vessel's body, you would've witnessed it's amazing capacity to hold 'more than enough'...people, cars, trucks, rvs, campers and more...all on their way to something greater, along their own journey...once they hit land. 
For the people who live here, in these two lakeports, the SS Badger is more than a big ship...it's a way of living! The coffee shops, restaurants, and retail shops...all up and down the main street of these DOWNTOWN local business districts...are small, family owned businesses...all relying on the daily, individual arrivals from the "other side"! To an artisan, like myself...it's a valuable commodity!  We wait upon the arrival of it's travelers, who will most likely be shopping, eating and foraging through the many shops...It's come to be known as the  reliable SS Badger "TRAFFIC", that comes into our ports, 'off the boat', to EXPLORE our city's finery and activities along the LAKESHORE! 
Now, I'm sure some of you are thinkin'...what's so unusual about this ship?! Why would we want to dedicate any time to its existance at all? It's only a ship, right?! Well, did ya know that it's the VERY LAST coal burning steamship in the United States...as well as, the VERY LAST vessel service here on the Great Lakes altogether! It's a "One of a Kind"!!!! 
          So, with that being said...it's sort of a SPECIAL THING...One that needs our attention, our love, our local, regional, state and national support! It's a UNIQUE set of circumstances, that have brought our two cities together as 'Seaside Sisters'...each one helping the other to grow and survive in these tough economic times. These small businesses then, are coming together to fuel a NEW HAVEN for it's lakeside travelers...all looking for something GREATER, then where they came!
With this new journey, I am thrilled to take you on...along side of me...we're going to enter a whole new level of the SS Badger...one with yarn and hook. It's a crochet story of timeless abandon, that will hopefully inspire each of you to reach beyond what you know...to allow yourself to be challenged to do something without a pattern or a diagram...only your passion to succeed!

Starting off, let me say...that any attempt to try, is already less than a failure! So...here we go! Let's board our SS Badger together...one foundation stitch at a time!
Considering that this ship is extremely large...I wanted to make it BIGGER than normal...not lifesize, but...Table Size! As I looked at my kitchen table this morning, I envisioned the bottom of the ship resting in it's middle...and I began to take measurements! 
With a finished measurement in my 'minds eye', thirty inches looked like a good place to start...but then, I needed to decide on a good hook size and what yarn I was going to use. So, I chose an H hook, and found some Lion Brand Heartland yarn in my stash, that I've used many times over in smaller projects. It seemed fitting to use a good American made yarn in my newest project...epsecially right here in the Midwest!
Needless to say, "our project project is born"...and we will call it the lil' ss bagder...lol!
How many stitches can I make in 30"...105! That's 104 chains, with 1 turning ch to start off with....and begin with 2sc in the 2nd ch from the hook, with 1 sc in each ch now across to the last ch, where you want to 2sc and cross over to the other side to sc all the way back to the beginning...and your first round is complete. 

you will have 208 scs at the end of this 1st round.

 Working into your second round here, take care to keep marking your rounds as you go along, with a paper clip or yarn...you're able to keep a better handle on these larger numbers then, if you use different colored markers for your (100) hundred marks...it makes it easier to count back from there, if you miss a stitch!
Now, if you're planning to build this along side of me...as a CAL...you might want to keep notes as we go here...I have a tendency to wander a bit...lol!

In this next round (2) 2sc in your join st (at your  marker), and in the next 2 sts (6sc in the next 3 sts overall), then sc in each st around (101 sts), then 2sc in the next 3 sts, and continue to sc in each st around til you come to the stitch marker again (ending round 2 and signifying the next round to begin)...leaving you with 216 sts at the completion of this round now.

Rnd 3: 2sc in the next 5 stitches, and sc in each st around for 102 sts, then 2sc in the next 6 sts and continue to sc around in the following 102 sts, and finish off this round with 2sc in the last st, before the stitch marker from the previous round. This will bring you up to 228 sts now in this round...
Rnd 4: 2sc in the next 8 sts, sc in the next 106 sts, 2sc in the next 8 sts, sc in the next 106 sts...bringing you back to your st marker at 244 sts to complete that round.

Remember to keep checking your size...we don't want to steer off course here...no pun intended...right?! Your initial chain should be 30", with your 4th row coming in at 32" in length. 

Round 4...whew! Many more months to come!

Whoop!!!! We're on our way to the other side....how far is it to the other side you say? Well, it takes the SS Badger approximately 4 hours to cross the Lake, that's about 60 miles wide...and if that's any indication to how long it will take me to make our lil' ss...keep guessin'! 
I'm clueless...since this is my first time to cross the great divide myself here! But let's timeline it....I'm thinkin' July 2015! Wowza...hope I don't disappoint anyone here! That's 4 months....and who knows how much yarn later...well, it'll be a trip, either way! 
Tune in tomorrow for the next leg of our journey....I now have to get more yarn...lol! I only had a small ball to begin our trip...so, for now....I'm dead in the water here folks! 
Silly me....never a dull moment along the lakeshore! And off to the store I go....


Monday, September 9, 2013

'Make-It Mondays'...Canning Tomato Soup

Good Monday to everyone....I am so glad you're able to join me today! It's a bit gloomy here today...but, we're going to warm it up a bit. 

Some days, when it's cloudy outside, and the weather seems a bit drab...I love to find something comfortable to wear and hang out all day doing what I love to do!
How bout' you?!

Well, today...we're going to the kitchen! It's really one of my favorite places to be in most days! I love to cook...it's very comforting to me!
And for that very reason...we're going to learn how to make one of my favorite all time COMFORT FOODS...
"Home-CANNED TOMATO SOUP"!

Yep, you heard me correctly...we're going to be doing a little bit o' canning today!

Alot of people don't think it's something that they have time for, or that they can even do it! But, that's simply not true! You don't have to be a nutritionist, or have a phd...however, you do have to be able to read a recipe...and have a few supplies to can with. 
That sounds simple enough...RIGHT?!

Let's hop to it then!
 You're going to need a few fresh ingredients...TOMATOES, CELERY, ONIONS and GARLIC!
Clean it all well in your sink. TIP#1: soaking your onions in cold water before you go to chopping away at it, will make your job a much more pleasant experience, if ya know what I mean! 
NO TEARS HERE!

After rinsing and cleaning...you'll want to add boiling hot water to your tomatoes in another container, so that you can easily peel the tomato skins off, before cutting them up to put into your cooking pot.
As you can see here, within a minute or two of dousing them with the boiling hot water...the skins start to lift all by themselves. Rid your tomatoes of any blemishes and of course...discard the cores! 
We only want the tomato to go into the pot here!
Next....With warm, clean water... you want to add a little bit in the bottom of your pot first, so your tomatoes don't stick to your pot...
then, begin adding all your other ingredients that you want to add in to give your soup FLAVOR!
You'll want to  finely chop up 1 lg. onion, 1 large hunk of celery, and about 3 lg. whole pieces of garlic. After it's all chopped up well, put it all in with the tomatoes...before you begin to cook it all down. I generally use about 8 quarts or so of tomatoes for this recipe.
Blend it all together, and continue to stir it occasionally...so the tomatoes don't stick to the bottom of your pot. Generally, this process takes about 20-30 minutes or so, to cook through....I like to simmer mine for another 10 minutes or so after it all begins to gently boil. 
 Hint....I make very large batches...but you can just make enough for just tonight's meal, if you prefer! It's all up to you...
Now, I put it through a hand-strainer (there's a few different devises out there in the stores...you might have a different model than I do). This is another kind I have, that I like to use as well...
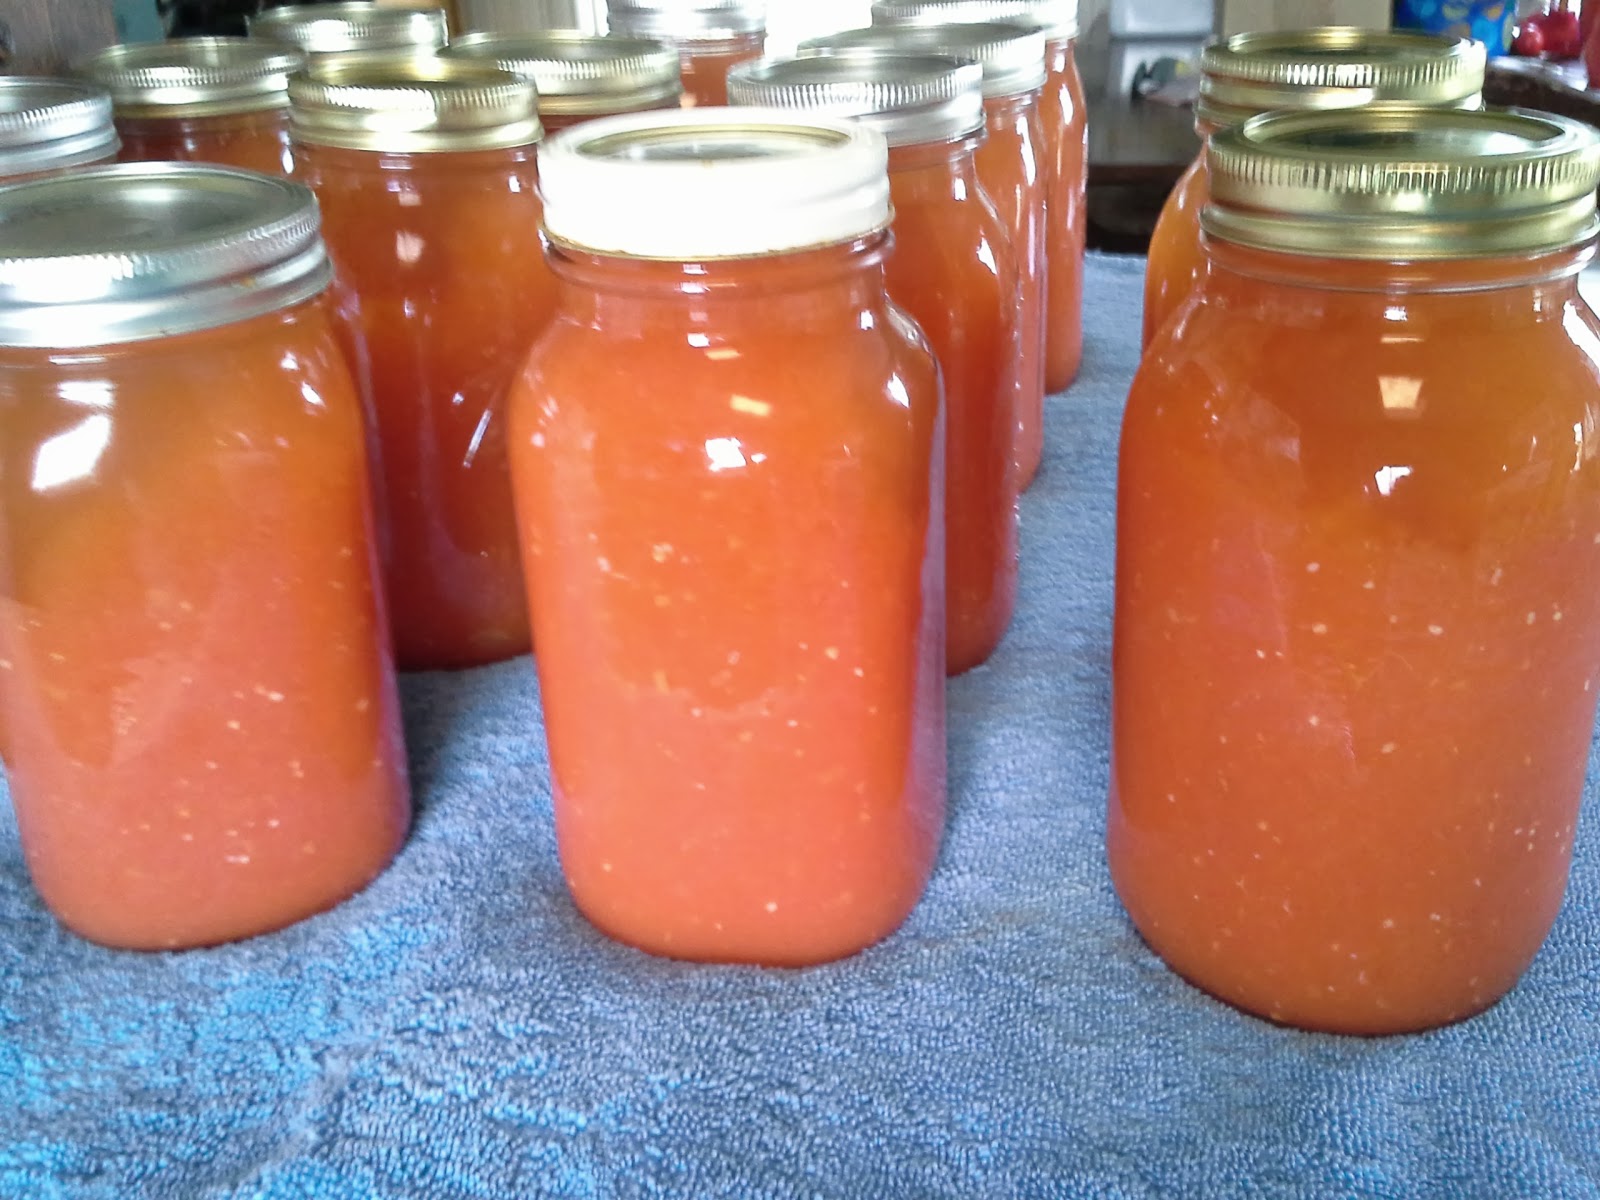
Photo After straining the tomato blend all through the strainer, you only get the juice and some pulp from the tomatoes as you strain it down...
and you'll discard the rest of what's left inside...the chunks of onion, and celery...
 adding it to my skins from before, I put it all in my compost pile, out back of my barn...and I let 'mother nature' take its course!
Photo

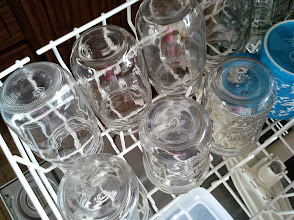
Next, I proceed to put the juice into my quart size jars that I've already washed in hot water (I like to put mine into the dishwasher first....gets em' all sanitized and we're not worrying about any microorganism growth for the future of your soup's shelf life!)
PhotoGathering up the rest of the items you'll need to finish canning your soup...lids, rings, your water bath canner...and something to get the jars in and out of the canner is always helpful, too! 
Make sure you sanitize your lids before placing them on your jar tops, and then carefully seal them with your jar ring ( I always make sure they're nice and tight)...it's all extremely instrumental in making sure to get a nice tight seal for processing your soup. 
Process them in the boiling water bath for 25-30 minutes, then...gently take them out, and place them on the counter for cooling. You'll want to place them on a support of towels for effective cooling, while protecting your counter from the extreme temperature of your jars as well. 

 Once they begin to cool, you will here some POPS...don't be alarmed...that's just your soup...curing for the long shelf life ahead!

Wha...la! Now, that wasn't hard...was it?!

Hope you enjoyed making homemade tomato soup with me today! 
Now...it's time for GRILLED CHEESE SANDWICHES, and Tomato Soup!
Yummmmm....more comfort food!

See ya next Monday...for more "Make-It Mondays", with Get Hooked with Tammy!
I pray you'll be enjoying the rest of your week...til' then!


Monday, September 2, 2013

"Make-It Monday" Week 2

Happy Labor Day all! It's sort of sad to see summer on it's way out...but, my truly favorite time of year is here! So, how can I be sad about that?! 


FALLing into large leaf piles, carving pumpkins and drinking crisp apple cider...but, more than not...dressing the part! 
I love to layer...with jackets, scarves, leg warmers, long sweaters and MORE! 

Greens, golds, oranges and reds...all mixed up with a lovely scent of cinnamon and strudel! 

Hot cocoa, melting marshmallows and loads of freshly whipped cream...
How can you get more FALLish, than that?!

With all that in mind...I decided it was time to start getting ready for playing outside in the cooler weather, with some gorgeous gold yarn and a newly designed pattern for 
'Over the knee legwarmers'!

Ready?!...Let's "Make-IT Monday"!

Pick out your favorite color yarn...mine happens to be a bright, bold gold today! For me, it's a color I love to wear with almost everything I have...
especially blue jeans and cowgirl boots!
But then, I'm a little more than just a country girl at heart...I actually live it! Which, for me...makes Hand-Made more of a lifestyle choice than most. 

With your yarn in hand...let's get our new pattern underway...
Go ahead and get your hook ready...I'm using a US/K/10.5 or 6.5mm hook today, along with
#156-Sungold/'I Love This Yarn'/from Hobby Lobby...100% acrylic; med. wt. 4 ply yarn
You will definitely need 2 skeins (approx. 450-500yds.) to make the set of leggings.

These will fit an average adult leg...I tried them on my daughter too...you can adjust them to fit, smaller or larger as you go!

Start with chaining 60 stitches, and add 1 more for a turning chain...
1.Now, turn your hook, and sc back into the second chain from your hook, and continue to sc across to the end...you will have 60 sc stitches. Now, ch 1 and turn.
2. When you start this row, you'll want to sc in the front loop stitch ONLY and sc in each back st. across to the end of this row...60 sc sts., chain 1 and turn.

3. In the next row, sc in each of the back loop stitch ONLY, and across to the end...60 sc sts., ch 1 and turn. (This gives you your beginning foundation to your legging, which will give you somewhat of a ribbed appearance as you go.)

4. sc (single crochet) in the front loop ONLY in the next 20 sts; hdc (half double crochet) in the next 40 sts, in the front loop ONLY! ch 2, turn...
*If you've never done a hdc before, here's a quick little tutorial to help you out with that!
http://www.youtube.com/watch?feature=player_detailpage&v=i6PRr58euF4

5. hdc in back loop stitches ONLY across the first 40 sts, and sc in the next 20 sts....(back loops only) to the end, ch 1 and turn.
6. repeat row 4
7. repeat row 5
8. - ? rows 
(as wide as you need to make it to fit your leg!) keep alternating your pattern as you go!
 You will begin to see your ribbing adding up as you alternate your every two rows, from your shorter (sc) sts. that are forming your ankle area, to your longer (hdc) sts. in the latter part of your legging pattern that's working up the leg and over the knee now.

And when you get your desired width that you need to stitch it together, to form the legging...you'll tie off your last st. on your final row...and leave a really long tail (about 3 times the length of your finish legging now, and cut to length...so, you can sew it closed.)

Take your time and sew it up (INSIDE OUT! It should not be ribbed on the side you are sewing on now)...being careful to keep it even as you go...you should have about 60 sts. when it's all sewed up. Tie off at the top, when you get it all sewed up and weave in your end, so it doesn't show or unravel.

Now, start with your yarn again (same color or change to a new color now!) We're creating the cuff of the over the knee legging here...
Slip stitch in your last chain made for this first row of sc sts. around...try to keep 1 sc st to each opening as you go around...don't turn the legging right side out yet...keep working from the flat side here, not the ribbed side. (It'll look nicer, when done!)
Sc around...and sl st to the first chain you made when you started that row...ch 1 and turn. 
Now, sc back around...same amount of sts. from previous row and sl st to first sc from that row. (HOWEVER, DON'T TURN NOW!) You will now be crocheting in the round, as you go up here. 
At the end of this round, you'll ch 2 before starting the next round. 
We are going to be adding a cabled ribbing now to our top edge...with FPDC and BPDC, by alternating every other st.
(Here's a good little tutorial to help you out with these fun little stitches, if you've never done it before!) 
http://youtu.be/5dxkIU2MMCQ


Each round you make, should be the same amount of stitches as you build up...and you will sl st to the first chain made from the previous round, and ch 2 before beginning again.
And...once you have about 5 rounds made...you'll ch 1 and sc in each st. around to make the last round before tieing off. Once done...weave in your end tail, and your legging is complete!
As you can see...it goes from your ankle, to over your knee! It's wonderfully adjustable....as you can see here...
Before I added the ribbed cuff on top...it fit my 7 year old's leg perfectly! 

Now...you can stitch up another one...so, you'll have a PRETTY PAIR of OVER-THE-KNEE-LEG WARMERS, to add to your FALL accessory collection this year!

Hope you enjoy making a pair for yourself, or as a gift of Handmade to someone you love!

I'd love to see yours...send me your pics! You're welcome to keep up to our day to day happenings on my facebook page...
http://www.facebook.com/get-hooked-with-tammy/
please, come and join us...for even more fun with yarn...where yarn and color is fiber-licious!


Monday, August 26, 2013

All new..."MAKE-IT" Mondays!

Good Monday all! Hope your day is going well! As with most Mondays...they have a way of being hectic and chaotic...first day back to work from the weekend, usually has most people frazzled!
However, I am trying to take a different approach to Mondays now...get you on the right track...with a new DIY Project! 
Something to unwind your day, MAKE-IT Mondays....a time to relax, reflect and redirect your energies to something BETTER...something HANDMADE...something LOVELY!

Are you ready?! Let's get started!

"The Oversized Cowl"!

First off...let's begin, by doing my favorite thing...picking the yarn colors! 
Now...this is what I call "STASH-BUSTING"!

Go through your current stash, and pick out a variety of colors that you love to wear...that's right, I said "LOVE TO WEAR"!

This is what I picked today...
 Some charcoal, linen, caramel, and a variagated yarn with all of these and some turquoise too! 
Next...just make sure that all your yarn choices that you're working with are the same weight, and washability! Then, it'll all go together very nicely....giving you a neat appearance when it's all said and done. I like to be able to throw mine in the wash if needed...so, I usually stick to polyesters and the blends...no wools here! 

If you're not sure about this...look here, on the back label...it'll tell ya everything you need to know!
Different label companies here, but still 100% acrylic, medium weight yarn and both machine washable! Perfect...now, let's keep going, shall we?

I've chosen a size K hook for this Oversized Cowl Project...you can choose a bit bigger or smaller, depending on the size you're looking for this to be when all is said and done.

Then, you'll want to chain 144 stitches with the yarn you want to start with first and end with last...or any number stitches that divisable by 4.

After you're done chaining, you'll want to join the two ends to each other...carefully unravel the two sides, so you're chain isn't twisted...now, carefully slip stitch you hook through your first stitch you made...and the two ends will now be connected; leaving you with a BIG CIRCLE. 
Then, Ch 1, and sc into the same stitch as your join....now, continue to sc around til you get back to your join again...and sl st into the first sc you made in that first row. 
Once you've got your first row done...you're going to be starting what this pattern calls ROUND 1...by following this wonderful little pattern here at www.redheart.com...it's a lace mitt pattern...so easy to follow...you can download the pattern and follow it from Round 1, to 2, to 3 and repeat...til' it's the size you'd like to end up with when it's all done!
***Remember, you're not making the mitts...you're only following the first part of the pattern, so you don't have to go any further than round 3...just keep repeating the same pattern until you get your desired length.
When you change your yarn color on the second round, if you choose to change your yarn at all...remember, this project is about you...you can MAKE-IT, anyway you LOVE IT!
Join the new color yarn, and turn...then, sl st into the next 3sc sts loosely...and ch 4, then dc in the same stitch as your ch4 (this is your 'V' stitch)....then, skip the next three sts and DC 5 times in the very next st...(that's your fan stitch)

Keep going throughout...each round, changing colors as you go...as many different colors as you like, and keep repeating your pattern as you go.
It should start to look something like this as you build UP each consecutive round...and when it's all said and done..it should look something like this...
 Of, course...I have to tie in all my ends yet, from all my color changes...but that's just a matter of getting my sewing needle out yet. No worries there...I could leave it and go with a 'fringe look' too, if I like...and you can too! Accessorize it any which way you like...it's all about you darling!

See ya next Monday...for our next "Make-It Monday"!
Hope you had fun...send me your pics!
I'd love to see all your finished projects too!

Happy Monday all!